
WhatsApp Integration Guide
Connect WhatsApp Business to ChatFlow through Meta, with screenshots for every step, so your chatbot answers WhatsApp messages automatically.
Before you begin
This guide connects your WhatsApp Business account to ChatFlow so your chatbot answers WhatsApp messages 24/7 using the same knowledge base as your web chat. The ChatFlow side takes a minute; most of the work is in Meta's developer tools.
Before you begin
WhatsApp is available on the Growth and Enterprise plans. You will need a Meta Business account, a Meta developer app, and a business phone number for WhatsApp. Set aside about 40 minutes for the Meta setup.
Step 1: Start in ChatFlow
Open your chatbot, go to the Integrations tab, find WhatsApp, and select Connect WhatsApp. The connection modal shows the Callback URL and Verification Token you will paste into Meta later, and the fields where you will enter your WhatsApp credentials. Keep this tab open.

Step 2: Create a Meta Business account and app
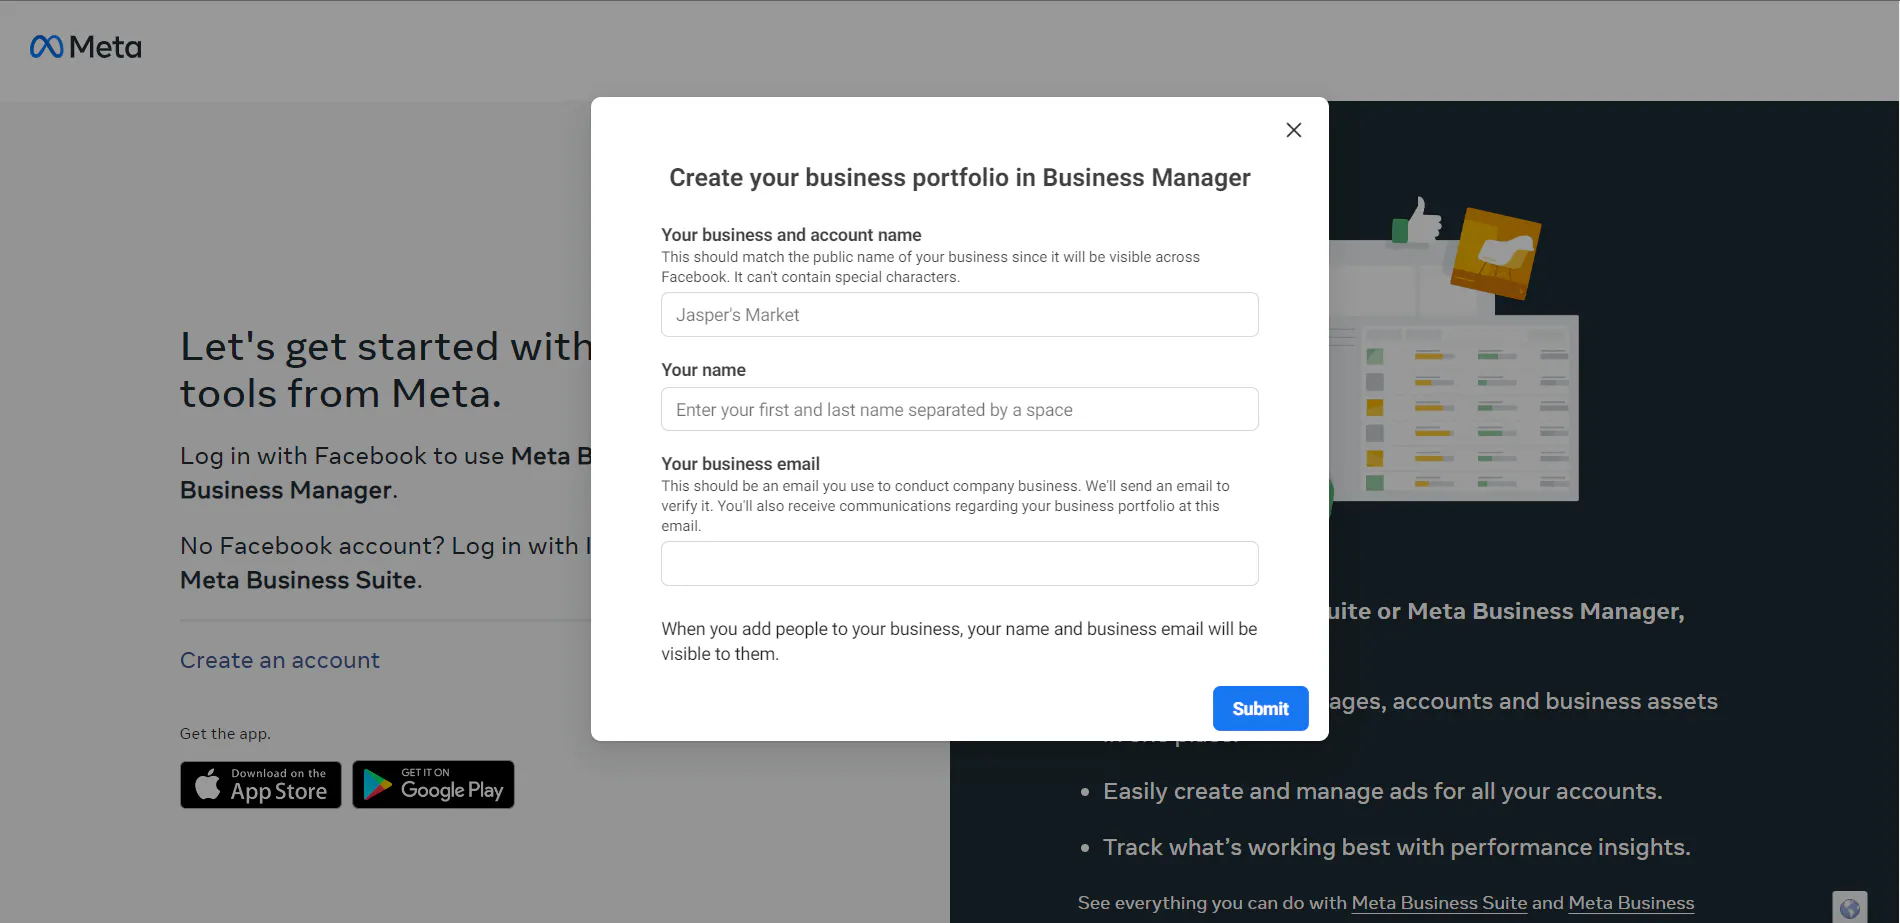
Create a Meta Business account
At business.facebook.com, create a business account with your business name, your name, and work email.
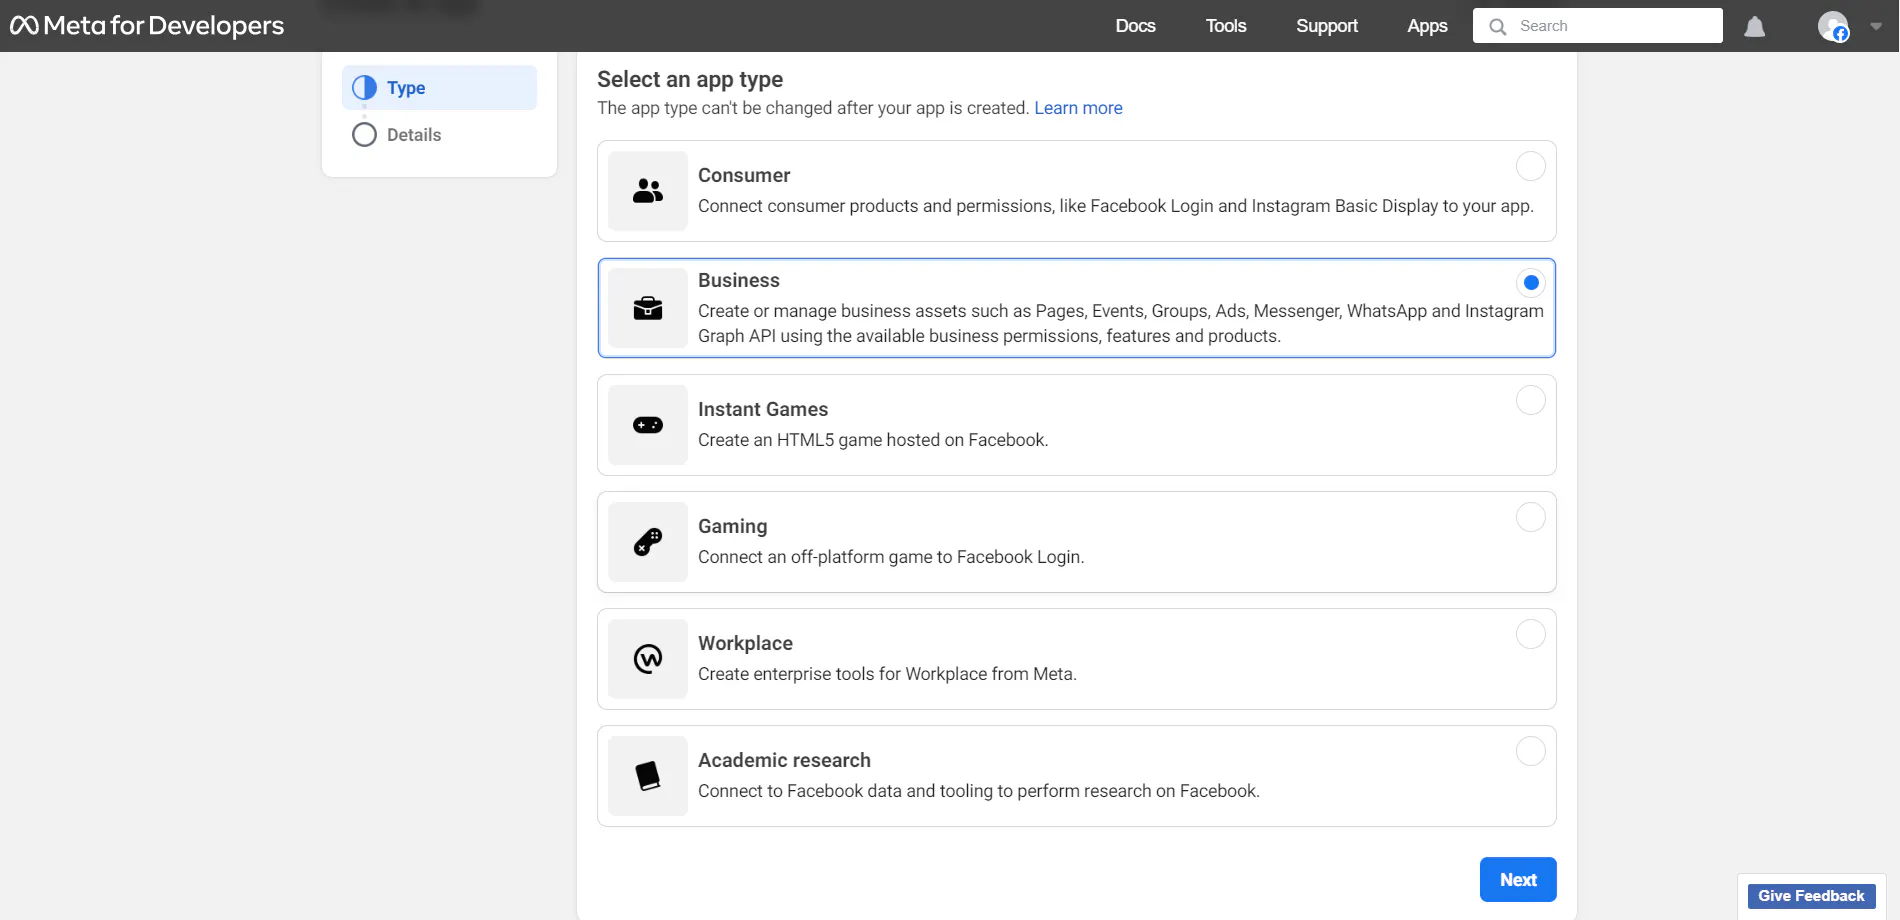
Create a developer app
At developers.facebook.com, select My Apps, then Create App. Choose use case Other, then app type Business, enter the app details, and create the app.
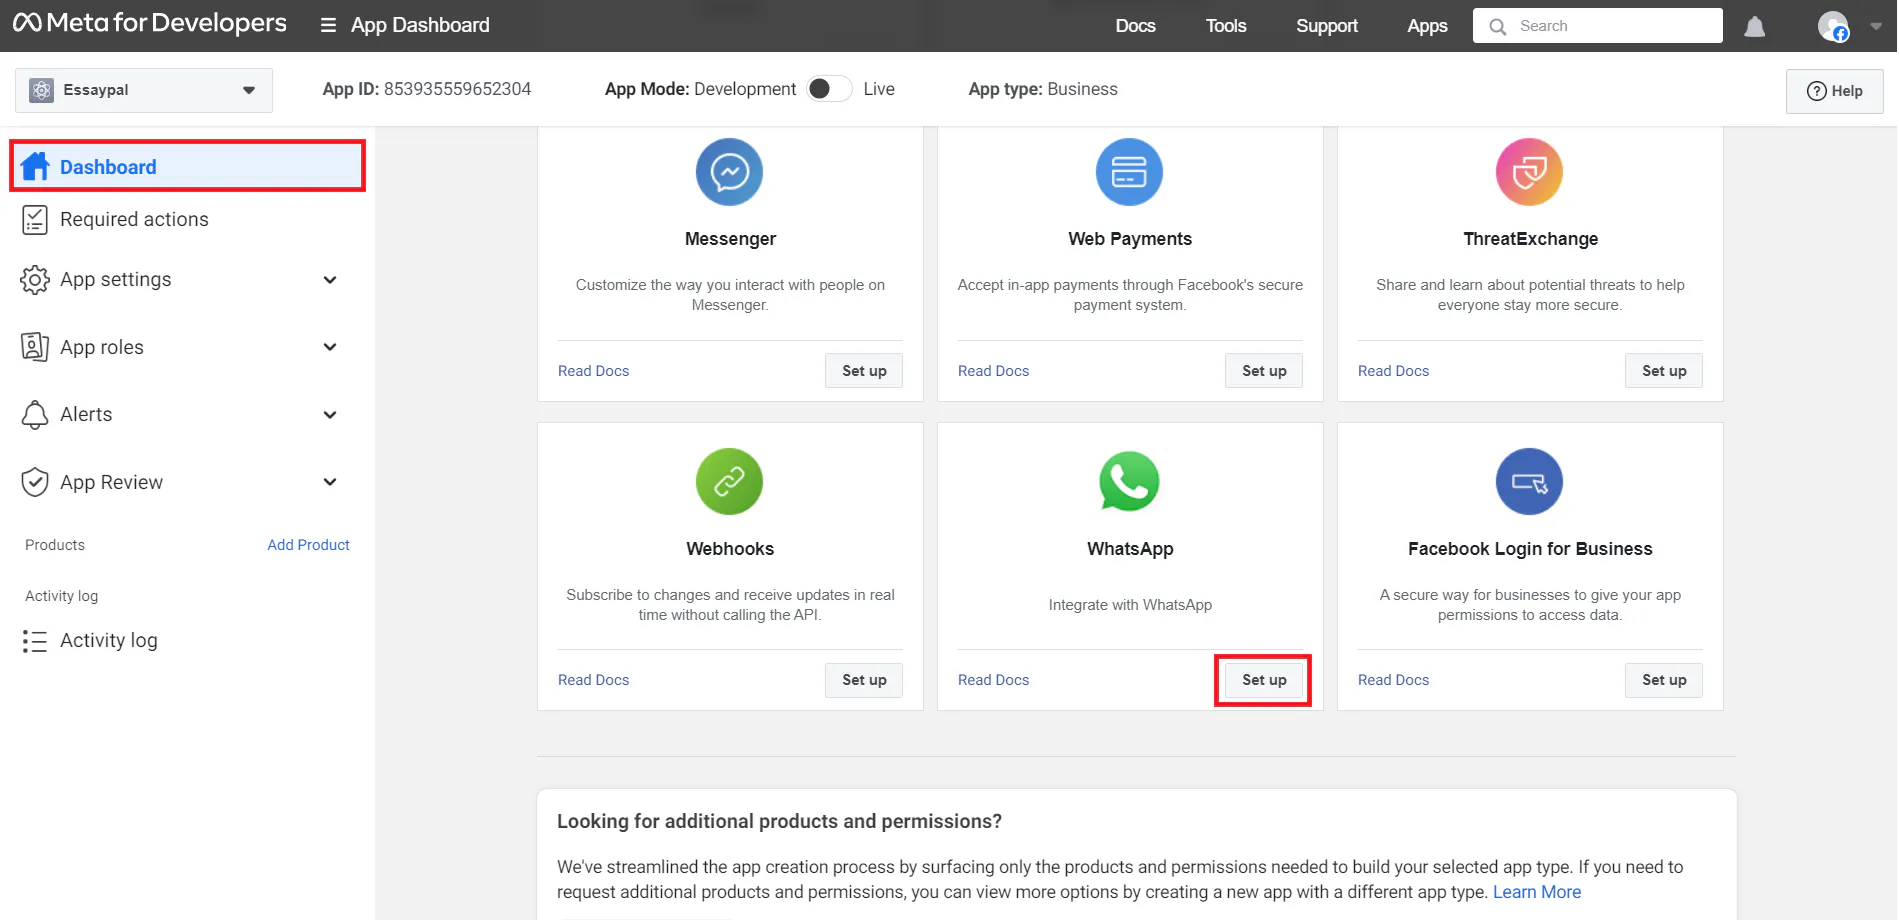
Add the WhatsApp product
In your app dashboard, find Add products to your app and set up WhatsApp, choosing your Meta Business account.
Set the privacy policy and go live
Go to App settings → Basic, set the Privacy Policy URL to https://chat-flow.app/privacy, save, and switch the app mode to Live.

Step 3: Add a phone number
In the WhatsApp API Setup, add your business phone number and verify it with the code Meta sends, then select it in API Setup. WhatsApp also requires a valid payment method on your Meta Business account before it can send messages.


Step 4: Generate a permanent access token
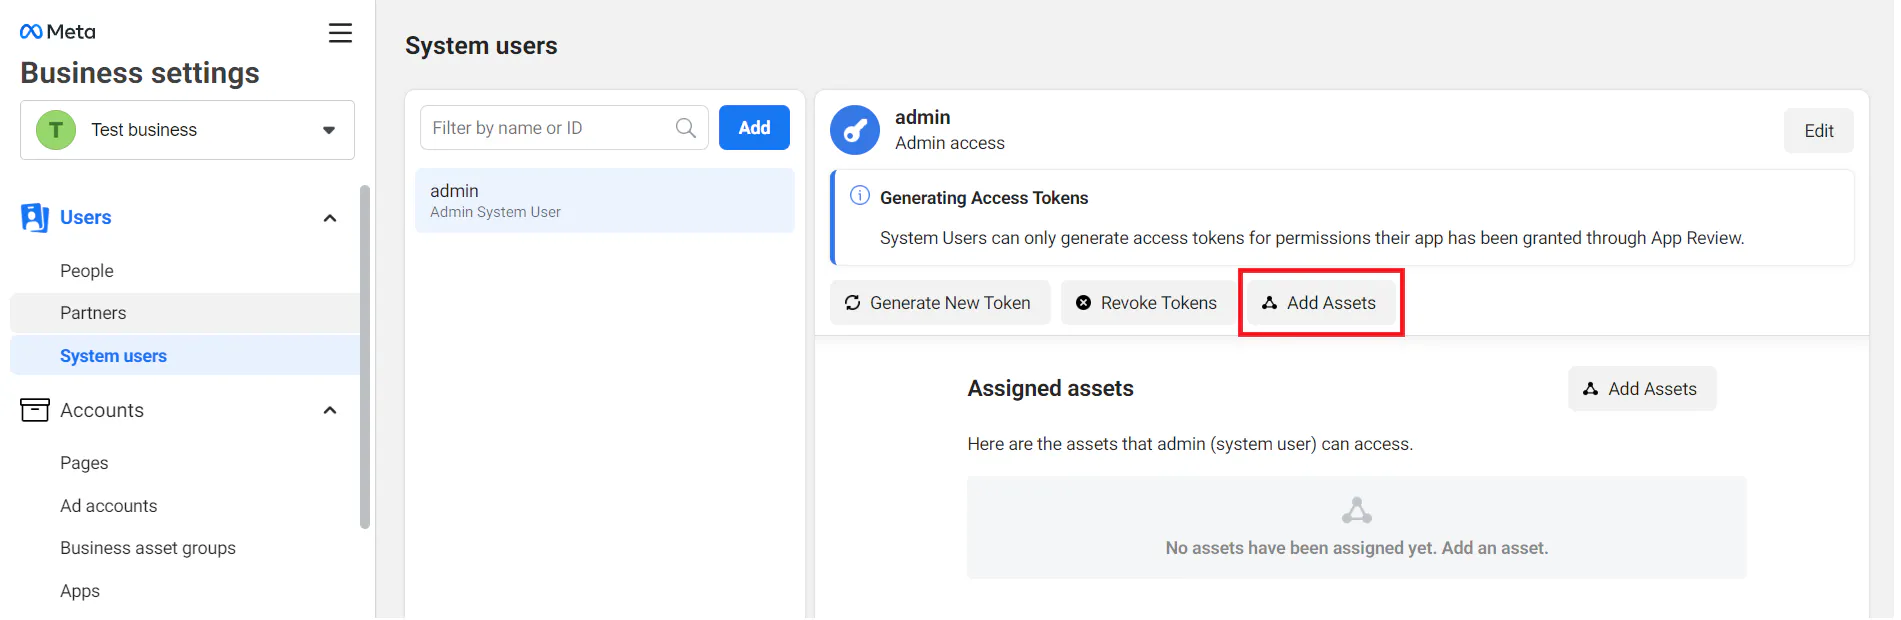
Create an Admin system user
In Business Settings → Users → System users, add an Admin system user.

Assign your app
Select Add Assets, choose Apps → your app, and grant full control.
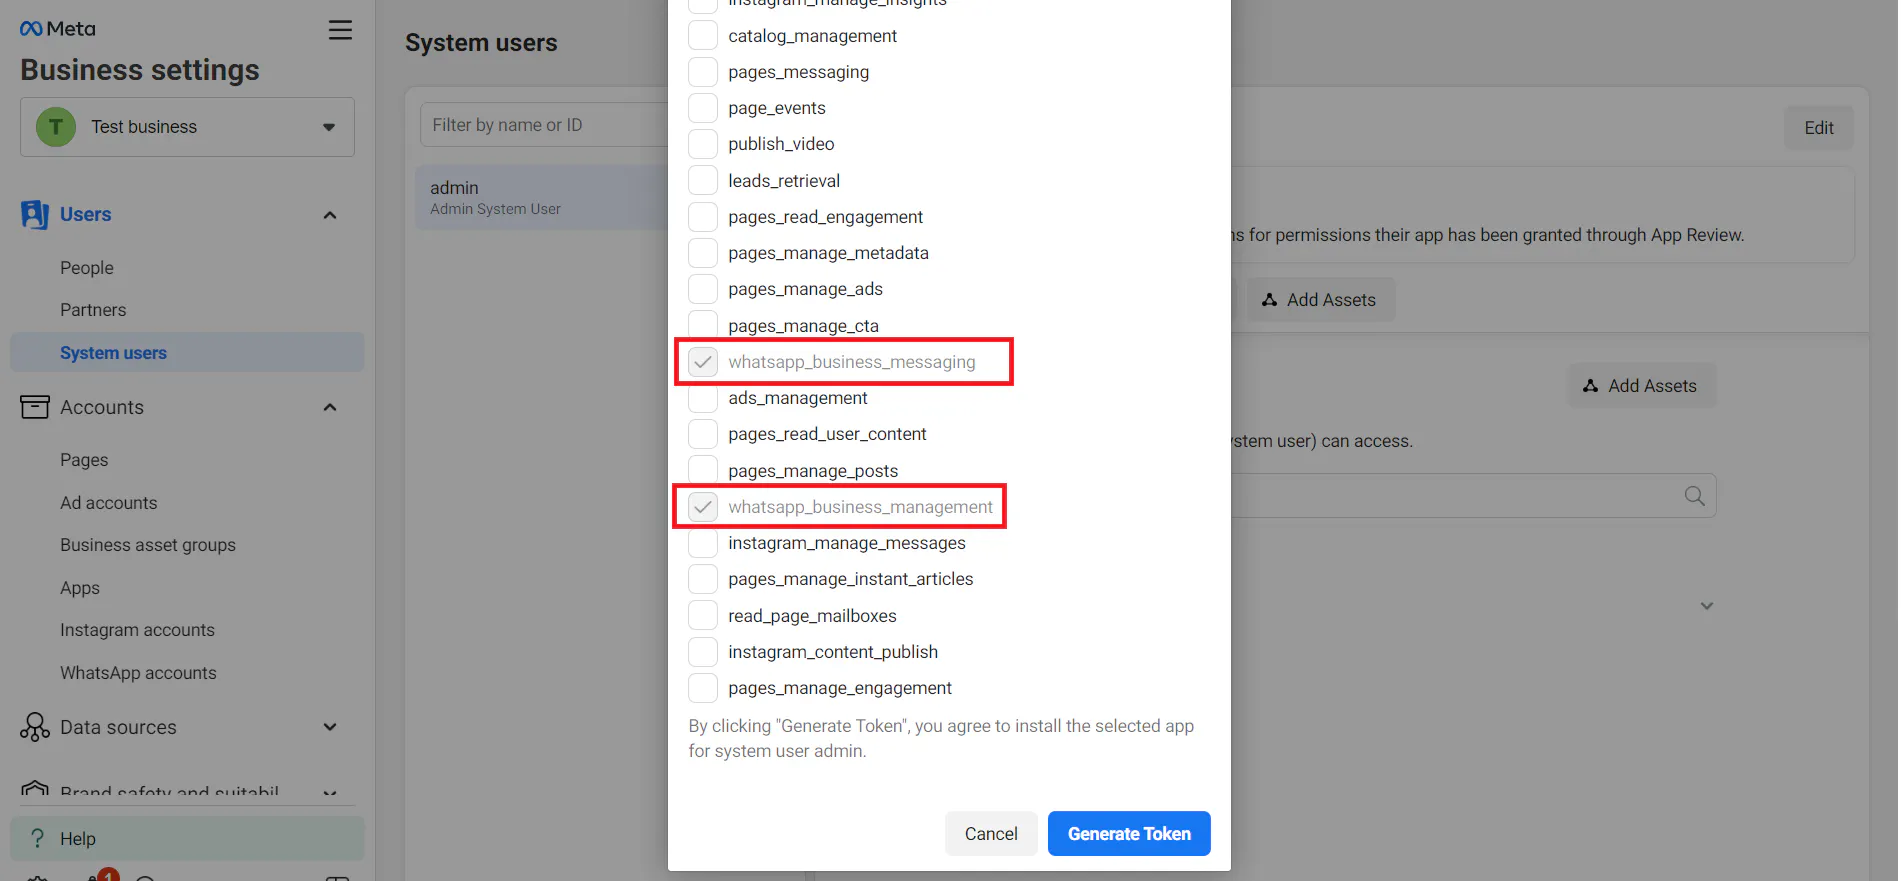
Generate the token
Select Generate New Token, choose your app, set expiration to Never, and select the whatsapp_business_messaging, whatsapp_business_management, and business_management permissions.
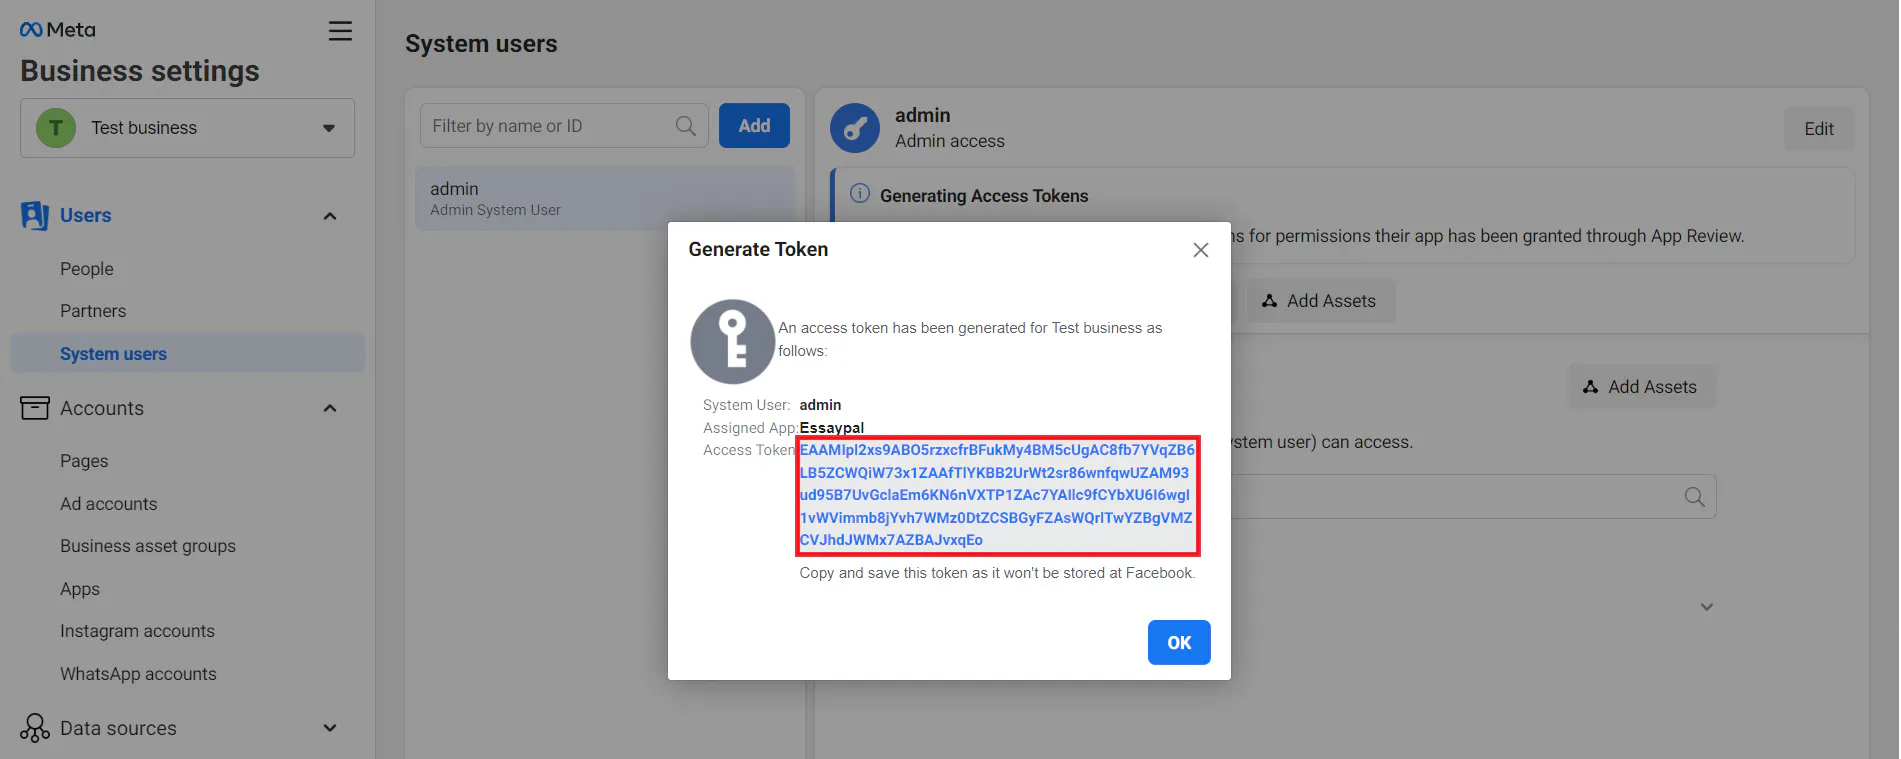
Copy and store it
Copy the token and store it somewhere safe, you will not be able to see it again.
Step 5: Configure the webhook
In the WhatsApp Configuration, edit the webhook. Paste the Callback URL and Verification Token from the ChatFlow modal, select Verify and save, then under Webhook Fields subscribe to messages.


Step 6: Finish in ChatFlow
Back in the ChatFlow modal, enter:
- Facebook App Secret, from App settings → Basic
- WhatsApp Access Token, the permanent token from Step 4
- Phone Number, Phone Number ID, and WhatsApp Business Account ID, from WhatsApp API Setup
Select Save.

Verify it's working
- From a different phone, message your connected WhatsApp Business number.
- Confirm the chatbot replies automatically.
- Open Conversations in ChatFlow and confirm the WhatsApp conversation appears.
Manage the integration
From the chatbot's Integrations tab you can edit the WhatsApp connection's tokens and settings, or remove it.
Troubleshooting
Messages are not being received
Confirm the integration shows as connected, that you subscribed to the messages webhook field, and that your chatbot has training content.
Webhook verification failed
The Callback URL and Verification Token must match ChatFlow exactly (the token is case-sensitive), and the Meta app must be in Live mode. Re-copy both from ChatFlow and try again.
The token expired or errors
Generate a fresh permanent token with the two WhatsApp permissions, set it to never expire, and update it in the ChatFlow integration.
WhatsApp messaging charges
WhatsApp Business has its own pricing, with a free monthly tier and per-conversation charges beyond it that depend on type and region. Those charges are billed by Meta, not ChatFlow. See WhatsApp's pricing and make sure your messaging follows WhatsApp's Business and Commerce policies.